Looking to give your Halloween nails a spooky twist this year? With just a little time and creativity, you can create Halloween-themed nails that will impress your friends and make your costume pop! Whether you’re a beginner or a nail art pro, here are some fun and easy Halloween nail art ideas to try.
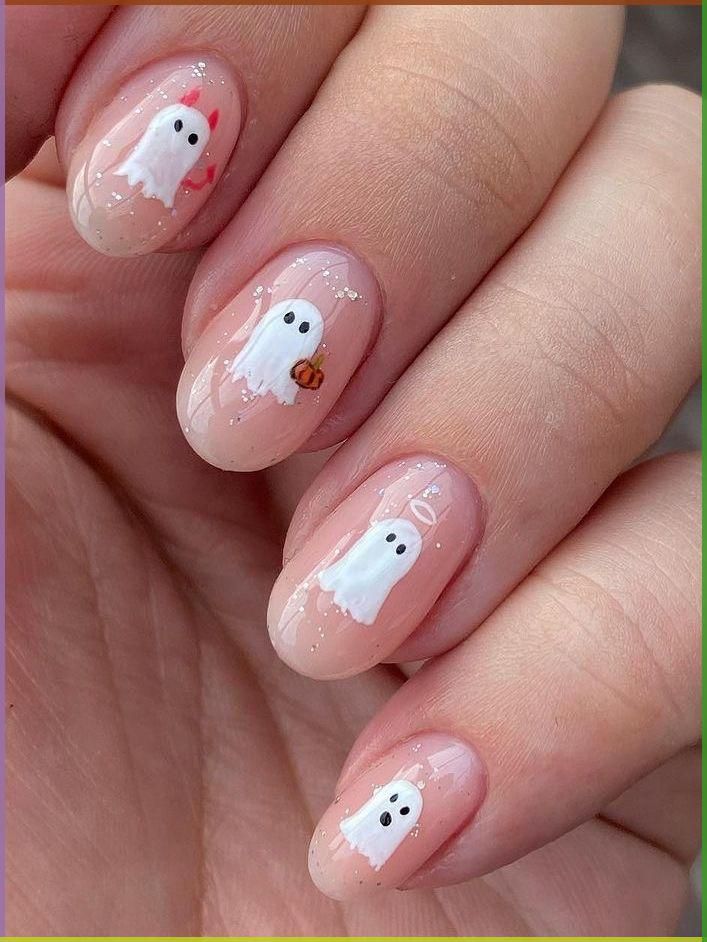
1. Cute Ghost Halloween Nails
These cute ghost nails are super easy to create and perfect for a subtle Halloween look!
You’ll need:
- White nail polish
- Black nail polish or a black nail art pen
- Clear top coat
Steps:
Finally, add a clear top coat to seal in your ghost design, and your Halloween nails are done!
To start, paint your nails with a white base coat and let it dry completely.
Next, use the black nail art pen (or a thin brush dipped in black polish) to draw two small eyes and a mouth for your ghost. Make them look cute or surprised it’s up to you!


2. Spooky Spider Web Halloween Nails
Spider web nails are a great way to add some Halloween spirit without being too scary. Plus, they’re easier than they look!
You’ll need:
- Black nail polish
- White nail polish or a nail art pen
- Clear top coat
Steps:
- First, paint your nails with a black base coat and wait for them to dry.
- Then, use the white nail art pen (or a thin brush) to draw lines from one corner of your nail to the other, creating a web-like pattern.
- Connect the lines with small curved strokes to make it look like a spider web.
- Finally, finish with a clear top coat for extra shine and durability. Now you have spooky spider web Halloween nails!


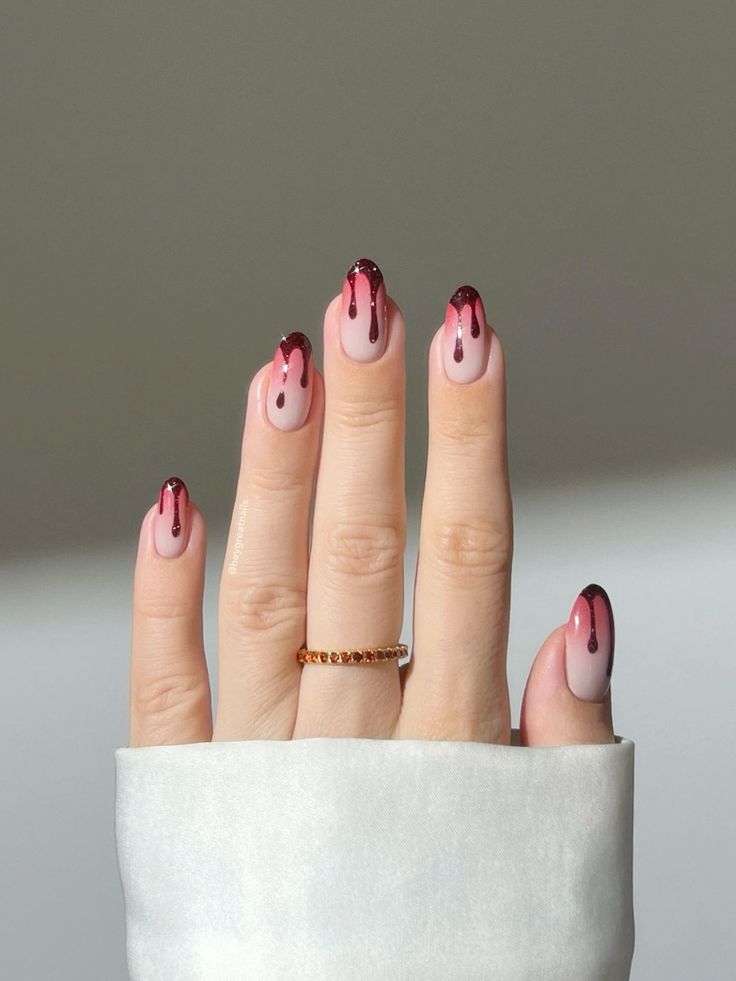
3. Bloody Drip Halloween Nails
This design is perfect if you want something spooky but still simple.
You’ll need:
- Red nail polish
- Nude or light pink nail polish
- Clear top coat
Steps:
After the red polish dries, finish with a top coat to seal your bloody Halloween nails.
Begin with a nude or light pink base color to make the “blood” stand out.
Once dry, use the red polish to create “blood drips” near the top of your nails. Start with small dots and drag them downward to create the dripping effect.


4. Jack-O’-Lantern Halloween Nails
If you love pumpkins, try this cute Jack-O’-Lantern design!
You’ll need:
- Orange nail polish
- Black nail polish or nail art pen
- Clear top coat
Steps:
- To start, paint your nails orange and let them dry completely.
- Next, using the black nail art pen or a thin brush, draw triangle eyes and a toothy grin for a classic Jack-O’-Lantern face.
- Lastly, add a clear top coat to keep the design shiny and chip-free. You’ll have festive Halloween nails ready to impress!


5. Candy Corn Halloween Nails
Candy corn nails are perfect if you want something festive and colorful!
You’ll need:
- Orange, yellow, and white nail polish
- Clear top coat
Steps:
- Begin with a white base coat and let it dry.
- Then, paint a thick orange stripe across the middle of your nail.
- Finish with a yellow stripe at the bottom. Make sure each color dries before moving to the next.
- Finally, add a top coat to seal the candy corn colors together, and your Halloween nails are ready!


Final Tips for Halloween Nails
- Practice Makes Perfect: If you’re new to nail art, try practicing on one nail before doing all of them.
- Use Tape for Straight Lines: For designs like candy corn, you can use small pieces of tape to help create clean, straight lines.
- Have Fun! Halloween nails are about being creative and having fun, so don’t stress if they’re not perfect.
This Halloween, your nails can be just as spooky and fun as your costume. So, grab your favorite nail polishes and get creative with these Halloween nail ideas—happy haunting! 🎃
Leave a Reply